Web Server Log Analyzer
Info
The log analysis functionality is additionally licensed.
Logan is a MITIGATOR functionality for analyzing logs of a protected Web server (HTTP, HTTPS), detecting anomalies and attacking addresses. Protected servers send their logs to the Logan using syslog RFC 3164 (UDP, TCP).
Logan can be located on the same server as the rest of the MITIGATOR, or separately.

Logan on MITIGATOR Instance
The following steps assume that an instance of MITIGATOR has already been installed. Otherwise, install one of methods first.
By default, Logan is disabled on MITIGATOR instance.
To enable Logan on a MITIGATOR instance, you need to override the scale
parameter value for Logan in the docker-compose.override.yml file from 0 to 1.
Analyzer on an External Server
In a cluster installation, you can move Logan to a separate server to redistribute the load.
Minimum System Requirements
- CPU: x86_64, 4 cores.
- RAM: 8+ GB.
- Disk space: 10+ GB.
Resource consumption depends on:
- the number of incoming tokens;
- the number and content of rules for each token;
- the format and size of incoming records;
- the use of detect‑rules.
External Server Setup
It is assumed that Docker, docker-compose and wireguard-dkms are already installed on the external server.
-
Create
mitigator-logandirectory on the server: -
Create a
.envfile with the following content:where
vXX.XX.X– is MITIGATOR version to which Logan will be connected (for example, v23.06.1). -
Download
docker-compose.yml: -
Create a service to run Logan on the external server:
Download the service file:
Activate the service:
-
Configure interactions with the MITIGATOR over VPN:
Instances of the MITIGATOR interact via Wireguard, a virtual network is created between them. In order for Logan to interact with other MITIGATOR instances, you need to configure a VPN, as well as for all instances within the cluster.
-
Run the services on the external server:
-
Log in to docker.mitigator.ru
-
Go to the work directory
-
Download the images
-
Run the service
-
-
Check the connectivity between Logan and the MITIGATOR instances:
-
Run command
-
Make sure there is a handshake between all members of the VPN network.
-
Configuration in the Web Interface
For the Logan to work both on the MITIGATOR instance and on an external
server, you must specify the address and port inside the VPN through which
the Logan is available.
The address and port are set as 10.8.3.254:7200 on the “Settings” page in the
“Common Protection Parameters” panel.
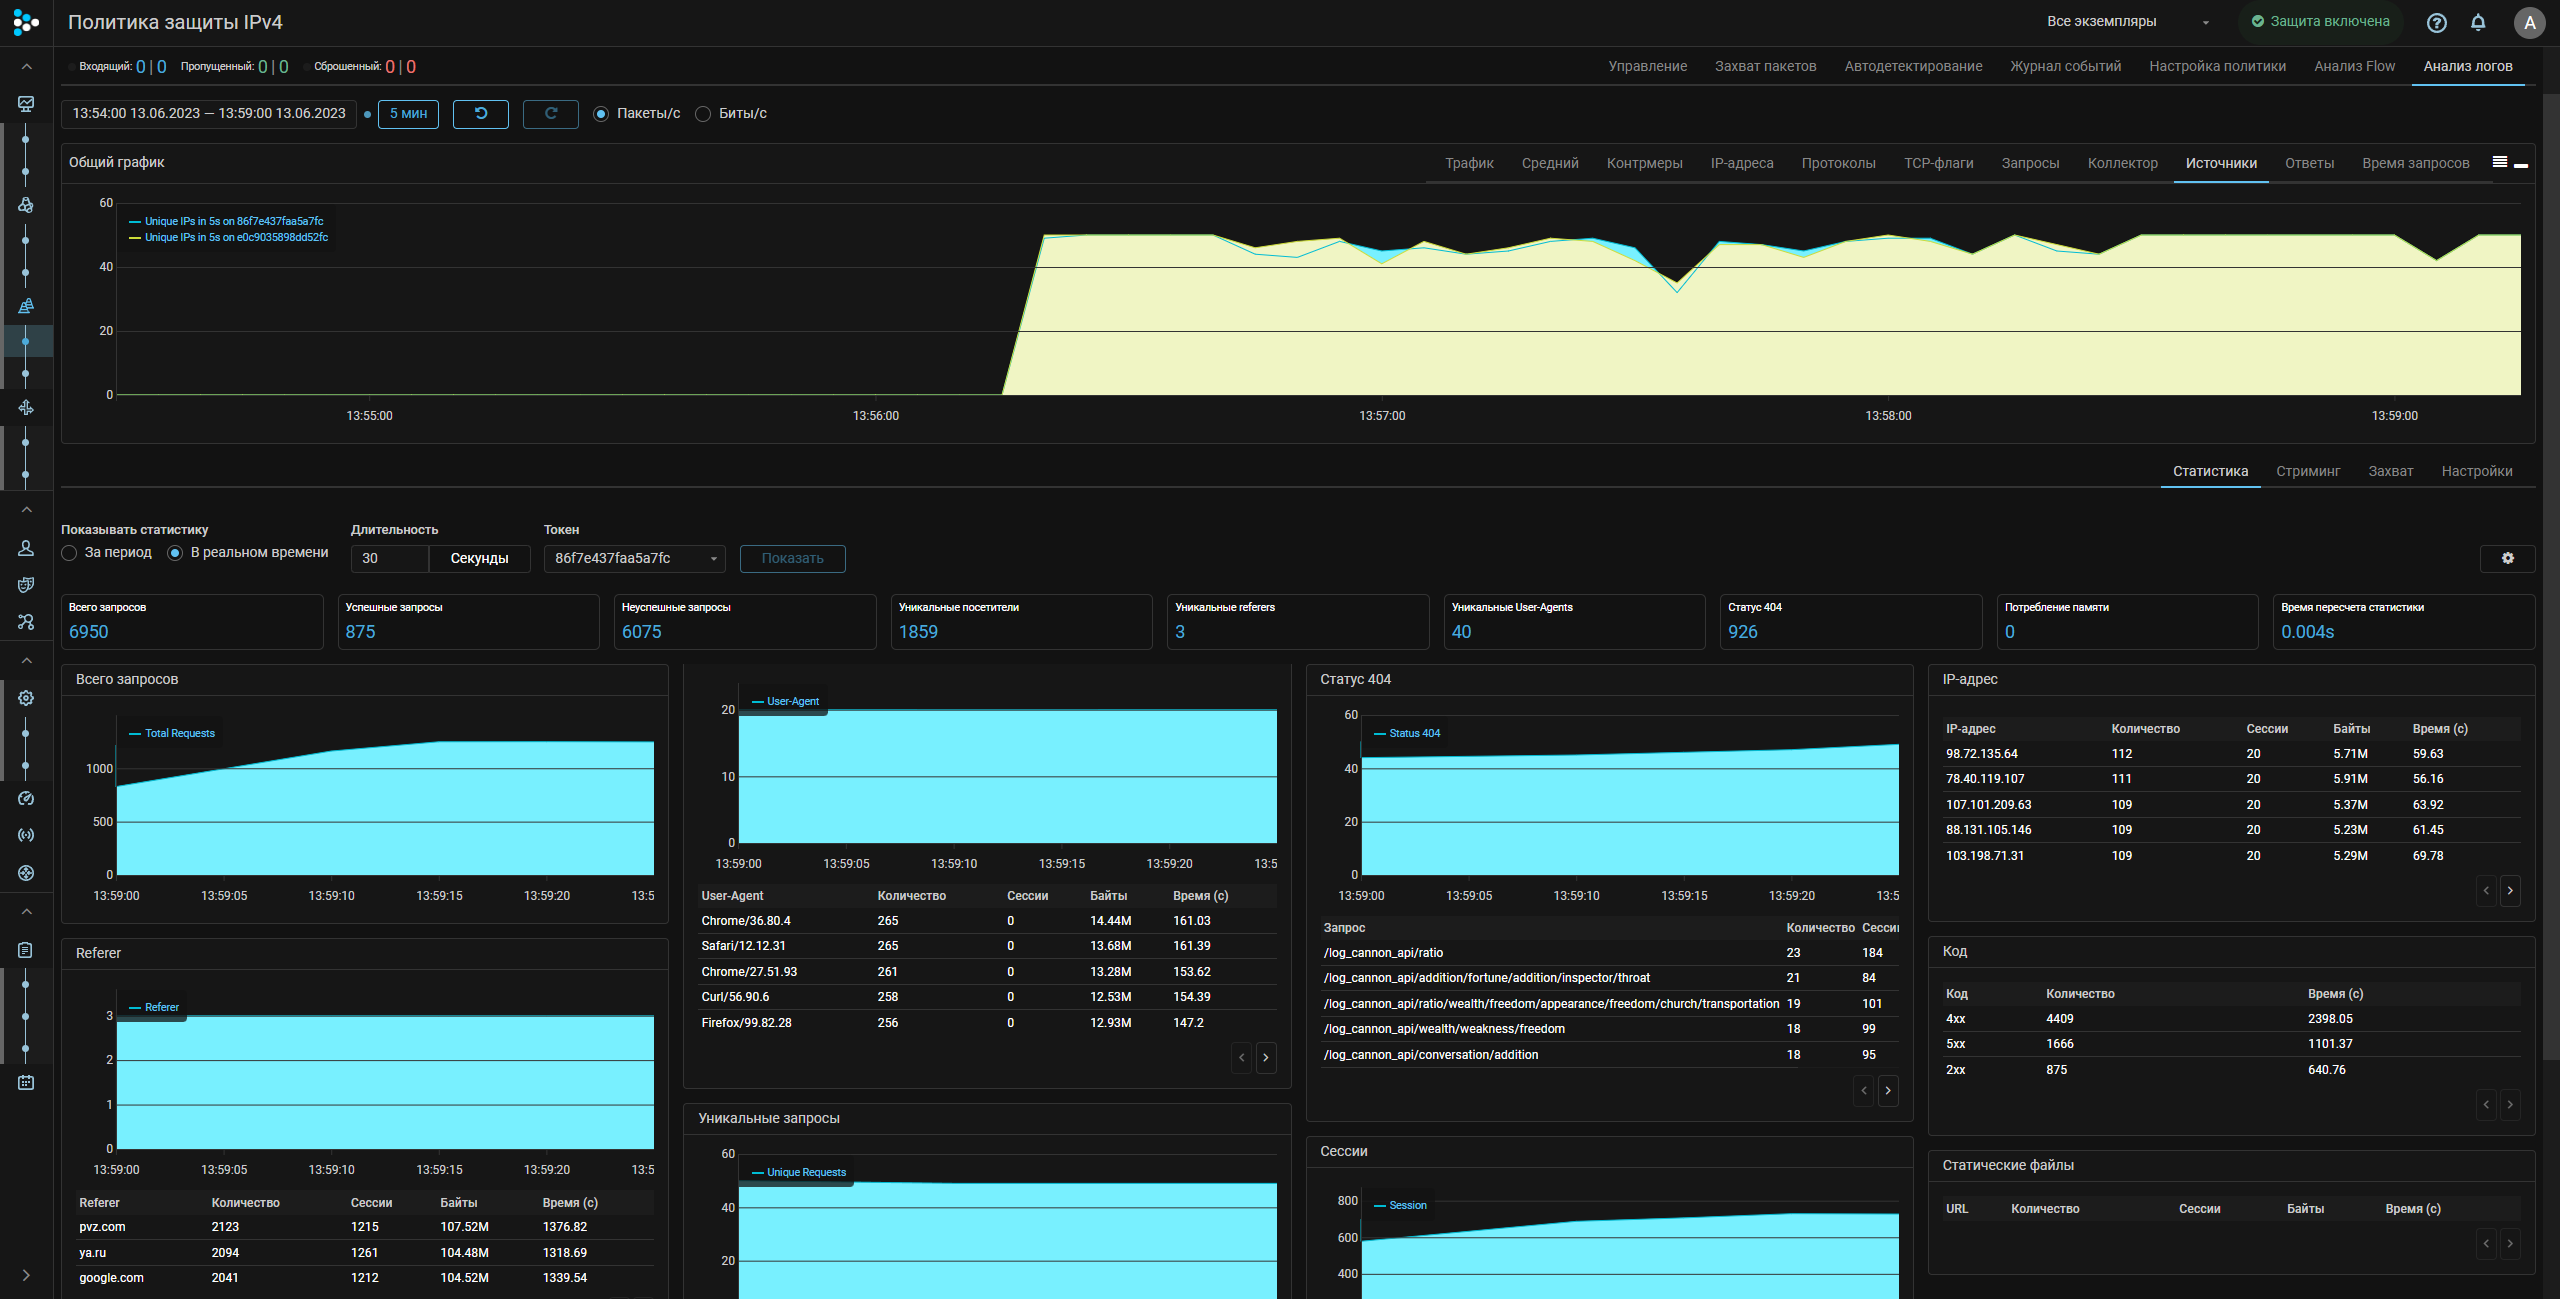
Further work with Logan is performed on the “Log Analysis” tab of the “Protection Policy” page. First of all, you need to set the rules by which Logan will work on the “Settings” tab.

A detailed description of the rules syntax for Web server incoming logs processing, the statistics and the Web interface elements is in the built-in help.
When the rules are set and applied, access to tabs with statistics, real-time streaming of logs and capture opens.
Configuring the Sending of Logs on the Web Server
Logan receives logs on ports:
- 7201 – UDP;
- 7202 – TCP.
Sending Logs with NGINX
NGINX allows to immediately send its logs over syslog without using any third-party applications (syslog-ng, rsyslog).
-
By default, nginx uses the “combined”, log format, which does not contain information about the processing time of the request
$request_time. You can define custom log format in/etc/nginx/nginx.conffile.Where
myformatis the name of the log format. -
In the site settings file, for example,
/etc/nginx/sites-enabled/default, set:Here
server=192.0.2.1:7201is the IP address and the port of the log analyzer.Through
tag=a secret identifier (token) is set, which allows you to
determine which service the entry in the log belongs to, it is known only to administrators of the protected service and protection policies. The token must contain 16 characters. iftag=is empty, then MITIGATOR uses the IP address from which the access_log is sent as a token. -
Restart NGINX.
NGINX Behind PROXY
If the nginx of the protected server is located behind a proxy or traffic balancer,
then substitution of real IP addresses of senders from the
X-Forwarded-For header must be configured. This requires the presence of the
http_realip_module module in nginx. You can check that the http_realip_module
module is installed using the command:
If the module is not installed, you should
reassemble nginx
with --with-http_realip_module parameter.
In the /etc/nginx/nginx.conf file on the protected server in the http section:
- Add the IP address of the Proxy server to the list of trusted:
Here 192.168.0.1/32 is the IP address of the Proxy server.
- Set “X-Forwarded-For” header as source
In the /etc/nginx/nginx.conf file on the Proxy server in the server section:
- Configure real address sending in
X-Real-IP header
Sending Logs with Syslog-ng
Approximate file configuration /etc/syslog-ng/conf.d/mitigator_log.conf
is listed below:
Correspondence Between Log Formats for Different Reverse-proxy
Above, in configuration example, the log format for NGINX is indicated.
For other reverse-proxy, the same log format is set as follows:
Apache
Haproxy
Transferring data to the statistics server
Logan has Relay enabled by default, which sends logs to the MITIGATOR statistics server.
This data is used to create a list of attacking IP addresses and for analytics.
For Relay to work, connection to al.mitigator.ru:7210 must be allowed.
To disable, set the LOGAN_RELAY_DISABLED variable to true in the
docker-compose.override.yml file.
Related Content
- Blocking IP on MITIGATOR with Nginx and Fail2ban
- Challenge-response Authentication Module for HTTP/HTTPS
- Executing Scripts on Log Events
- MITIGATOR Challenge Response
- TCP Protection with ISN Synchronization
- Access to the Grafana Interface
- BPF Guide
- Compatibility Policy
- Example: MCR UDP
- Exporting Metrics to Prometheus