Update
Info
Warning
Make a backup beforehand.
Info
After the system is updated and started, the database migration process begins. While the migration is in progress, the web interface will be unavailable. For large databases, this process can take a long time. You can track the completion of the migration by running the command:
There should be 2 entries in the grep results.
See also: compatibility policy of the versions.
BGP announcements
If MITIGATOR is configured to announce protected prefixes over BGP, then before updating the instance, disable the BGP connection for the instance being updated in the «Local BGP Settings» on the «BGP» page.
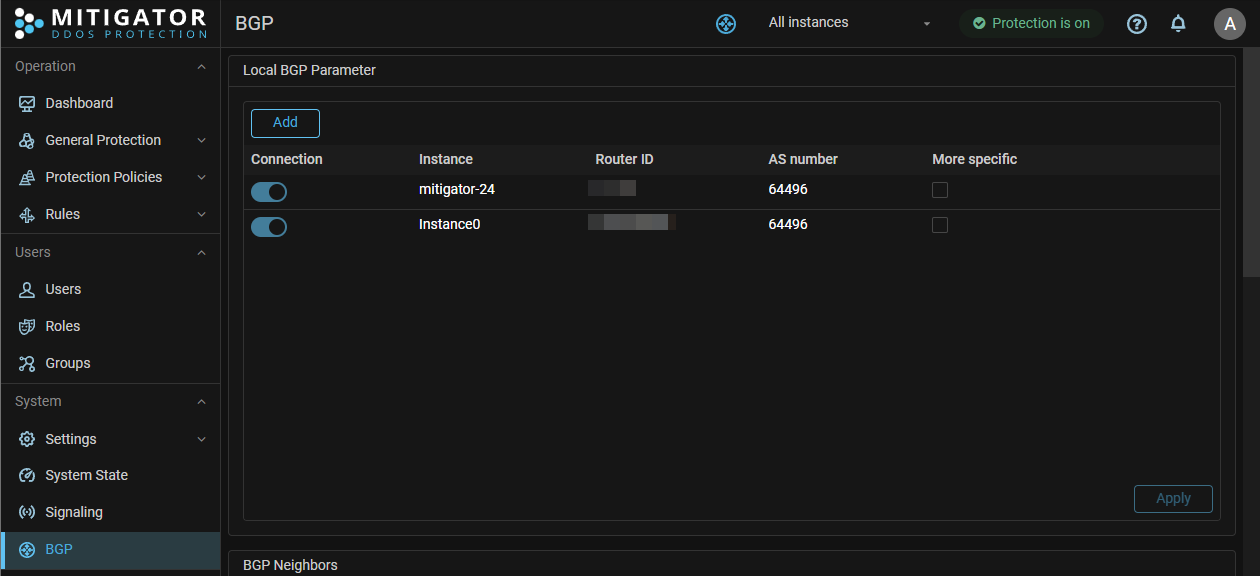
After completing the update of the instance, you should restore the BGP connection.
Isolated instance update
Info
After the update, it may take some time to enable protection and visualize graphs. Do not enable protection manually, it will turn on after spilling all the settings.
-
Make sure you have backup taken earlier.
-
Write a line with the version to the
.envfile:Where
vXX.XX.Xis a target version (for example: v25.12.1). -
Download the latest Compose file:
Where
vXX.XXis a target major version (for example: v25.12). -
Log in to the image repository with your credentials:
-
Download images:
-
Reboot all of the MITIGATOR components:
Info
After launching, refresh the MITIGATOR Web interface browser tab with clearing the cache.
Cluster update with shared non-redundant storage
Info
After the update, it may take some time to enable protection and visualize graphs. Do not enable protection manually, it will turn on after spilling all the settings.
-
Make sure you have backups taken earlier.
-
Stop all instances of MITIGATOR:
-
On all instances, write a line with the version to the
.envfile:Where
vXX.XX.Xis a target version (for example: v25.12.1). -
Download the latest
docker-compose.ymlon all instances:Where
vXX.XXis a target major version (for example: v25.12). -
On all instances except the base one, download the latest file
docker-compose.worker.yml: -
Enable Postgres on the base instance:
-
Starting with the leader, run on all instances sequentially:
Info
After launching, refresh the MITIGATOR Web interface browser tab with clearing the cache.
Updating a cluster with internal failover storage
Info
After the update, it may take some time to enable protection and visualize graphs. Do not enable protection manually, it will turn on after spilling all the settings.
-
Make sure you have backups taken earlier.
-
Stop all MITIGATOR instances running Postgres in standby mode, then stop the instance with Postgres in active mode:
-
On all instances, write a line with the version to the
.envfile:Where
vXX.XX.Xis a target version (for example: v25.12.1). -
Download the latest
docker-compose.ymlon all instances:Where
vXX.XXis a target major version (for example: v25.12). -
Activate an instance with Postgres in active mode, then activate all MITIGATOR instances with Postgres in standby mode:
Info
After launching, refresh the MITIGATOR Web interface browser tab with clearing the cache.
Updating a Cluster with External Failover Storage
Info
After the update, it may take some time to enable protection and visualize graphs. Do not enable protection manually, it will turn on after spilling all the settings.
Steps 2, 7 and 14 depend on the actual organization of the DBMS on the external server.
-
Make sure you have backups taken earlier.
-
Disable database access for all instances.
-
On all instances, write a line with the version to the
.envfile:Where
vXX.XX.Xis a target version (for example: v25.12.1). -
Download the latest
docker-compose.ymlon all instances:Where
vXX.XXis a target major version (for example: v25.12). -
Log in to the image store with your credentials:
-
Download images:
-
Make sure that database access is disabled on all instances:
-
Reboot all of the MITIGATOR components:
-
Perform the necessary database migrations (the actions are similar to those performed during the initial postgres setup postgres), , for which:
-
Run command:
-
Copy migration scripts:
-
Execute scripts using the utility SHMIG.
-
Run command:
-
Enable DB access for all instances.
Info
After launching, refresh the MITIGATOR Web interface browser tab with clearing the cache.